Schedule R Scripts with Windows 10 Task Scheduler
Here’s a common scenario – you write an Rmarkdown report that will need to be rendered at regular intervals as the underlying data is updated. In my role, this happens a lot with forms. We put out A LOT of forms to survey participants in our programs, get feedback on our services, etc. Some of these surveys may stay live for the entire year, while others have a very specific timeline, and in both cases, it is beneficial to run the R script that compiles the results into a report at regular intervals.
If you’re on a Windows machine like I am (specifically Windows 10), a little bit of Googling will lead you to the Windows Task Scheduler (and also the taskscheduleR package, to be discussed below). Task Scheduler allows you to schedule tasks (e.g. running an R script) with a range of settings.
Full disclosure: I stumbled my way through Task Scheduler before I learned of the taskscheduleR package – I won’t address is here because you can review the documentation for yourself (taskscheduleR package).
Getting Set Up
To begin, let’s create a reproducible example so we can walk through the process with the same code.
First, we will want to set up a project directory with the following steps:
- Within RStudio, choose File > New Project.
- Select New Directory.
- Select New Project.
- Enter a Directory name: – this will be the folder name. For consistency I’m going to use
task_scheduler_example, which I will reference throughout this post.
If you were successful, RStudio should have opened up a fresh session for you with an empty environment and a Files tab with a single item, task_scheduler_example.Rproj.
The Task Scheduler Way
Probably the easiest example we can use is to create a log that records every time the script runs. Depending on your project and infrastructure, there are many ways to do this that might make more or less sense given different specifications. For our purposes here, I will write our log to an RDS file (RDS files store a single R object).
Creating Our Script
First, create a new R Script file and save it as schedule_script.R.
The code below will get us started, but it won’t work as we want quite yet – see if you can spot why.
Bare Bones
# Capture the time the script runs

last_run <- Sys.time()

# Create a dataframe that will be our log

log <- data.frame(last_run)

# Write to RDS file "log.rds"

saveRDS(log, file = "log.rds")
This simple code will record the time the script runs and assign it to the variable last_run. Then, the dataframe log is created from last_run – log is a dataframe of one variable and one observation. Finally, log is written to a RDS file in our directory called log.RDS.
Adding Logic
This script won’t work for a log yet because it only records a single time, the last time the script was run. What we will want instead is to record the time and append that to our running log.
To achieve this, we can expand on our starter script from above. First, since our log will be stored in the RDS file, the first thing our script should do is check for the file in our directory. If it finds the file, we can move on, but if it doesn’t, that means we’ll be starting a new log and won’t need to append to an existing log.
# Check if log.rds exists

if(file.exists("log.rds")) {

  # Read in current log and assign to `log`

  log <- readRDS("log.rds")

  # Capture the time

  last_run <- Sys.time()

  # Add a row to our one-column dataframe
  # Assign it the value held in `last_run`

  log[nrow(log) + 1, 1] <- last_run

  saveRDS(log, file = "log.rds")


} else {

  # This is case where "log.rds" doesn't exist
  # So, we're starting a new log

  # Capture the time the script runs

  last_run <- Sys.time()

  # Create a dataframe that will be our log

  log <- data.frame(last_run)

  # Write to RDS file "log.rds"

  saveRDS(log, file =  "log.rds")

}
Now our script is first checking if log.rds exists in the directory – if it does, then the log is read in as log, a new run time is captured in last_run, the new time is added after the last row in log, and then log.rds is overwritten with the new data. If log.rds isn’t found, then the original script will be run, and log.rds will be created.
Accounting for the Working Directory
As we have this script written now, we are assuming log.rds is in our current directory. By default, however, when Task Scheduler runs our script, it will be run in a higher-level directory – for me it’s my user directory. So, when the script is run, it will look for log.rds in that directory, it won’t find it, and it will create the file in that location. Further, since our else condition only creates a dataframe with one observation, the log will be overridden on every run with a single value instead of creating a running log.
There are two solutions to this problem. The first is to use absolute file paths in our script. This could be tedious if we were writing out the file path for every instance of log.rds in our script, so it would make more sense to assigne the directory to an object and call that object in lieu of the string "log.rds".
The second solution – and the one I prefer – is to tell Task Scheduler to run the script in a specific directory. I find this preferrable because it makes it easier to write script that references files within its own directory, rather than cluttering the script with file paths.
So now, we are finally ready to schedule our script!
Scheduling the Script to Run
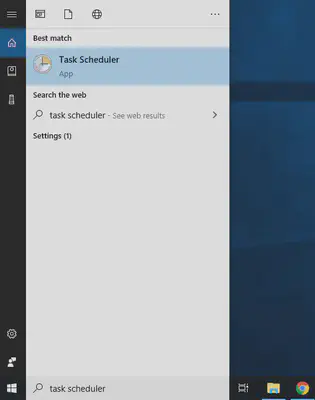
To open Task Scheduler, type task scheduler in the search bar next to the windows icon.
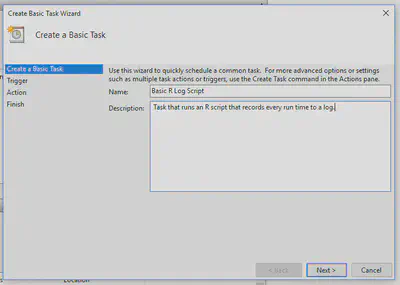
Once you have Task Scheduler open, you should see a pane on the right that has a list of Actions – select Create Basic Task…. The Create Basic Task Wizard should have popped up, and the first page is asking for a Name and Description – Let’s name it Basic R Log Script and give a short description.
When you’re ready, click Next.
The next page allows us to select Trigger settings – these will tell the computer when you want the script to run. This is arbitrary for our purposes, but I’m selecting Weekly. Once you’ve made your selection, click Next.
Now we are given settings that are specific to the Weekly cadence. When you select the Start date and time, that will be the time the script runs on each day that meets your other criteria. I am writing this on 08/02/2020 at 3:20:08 PM, and I’m going to leave that as-is. I will also select Monday and Wednesday, so the script will run every week on Monday and Wednesday at 3:20 PM. Click Next.
The Action we want to perform is Start a program – we will be starting R to run our scrip. Click Next.
The Program/script you need to enter is the file path to your version of Rscript.exe, and if your path has spaces in it as mine does, you need to wrap the whole path in double quotes. You can see mine below:

The important thing to understand is that Rscript.exe is a program that runs an R script – so, you need to pass the specific script as an argument (think of base R’s source() function and the filepath argument you have to pass into it). Just like we just did for Rscript.exe, we need to provide the full file path and wrap it in double quotes if there are spaces in the path.
Finally, we also need to provide the Start in (optional) argument because this is where we will set the directory for the script to run. If we don’t set this, we would need to edit our script to include absolute file paths. So, we can pull the directory path from that which we just used above for our schedule_script.R path – and no need to include the trailing \ on the path.
For some nonsensical, idiotic, Microsoft-cryptic reason, this field, unlike the other two fields we just completed, does NOT take quotes, even if there are spaces in the directory path. In fact, including quotes will throw an error that the directory path is invalid. Suffice it to say, this error frustrated me greatly, and I’m happy to be able to help you avoid this hurdle.
With all our arguments set, we can now click Next and review the information – if everything looks good, click Finish. Just like that, we have our script scheduled to run!
Testing
Rather than wait for our next scheduled runtime to see if everything is working as we want, let’s go ahead and manually run our task right now.
First, find our new task within the Task Scheduler Library – which you’ll see in the left pane below the File menu. Once you click on the library, you should see a list of tasks scheduled to run on your machine.
Find our Basic R Log Script task, and click on it. With the task highlighted, on the right panel under Actions, click Run. You might see a Command Prompt window open briefly, and you’ll see the Status of our script change from Ready to Running. You might not see it change off the Running status until you click Refresh on under Actions.
Once you do that, you should see under Last Run Results The operation completed succesfully. (0x0). You will also be able to see the Last Run Time, which is helpful if you want to run the script a few times to make sure everything is working correctly.
For our purposes, we want to make sure the script is working both when it needs to start the log from scratch and when it is just adding observations to the log, so go ahead and run it a couple more times. Then, open your project if you don’t have it open already, and load log.rds to your environment. You should see it has the same number of observations as the number of times you have run the script.
Debugging
My greatest source of frustration in scheduling tasks by far had been identifying errors. The “results” provided by Task Scheduler are incredibly cryptic and difficult to parse. One of the common ones I’ve seen is, instead of The operation completed succesfully. (0x0), I get (0x1). That’s it – no accompanying message to help you identify the error. What I’ve come to learn is that this message means the function returned an error, i.e. there was a bug in our script.
Debugging can be difficult because when you are working with your script in RStudio, you aren’t replicating the environment in which the script will run. To do that, we need to understand that Task Scheduler basically just runs scripts as we would from Command Prompt. So, my first step when I get the (0x1) error would be to to run the script from there, rather than diving back into my R code to try and figure it out.
Run R Script from Command Prompt
To run a script from Command Prompt, pull up Command Prompt by searching for it as we did with Task Scheduler. If you’re new to Command Prompt, don’t worry, this will be simple. We are going to run two lines of code and examine the output. These two lines will be the following:
- The first line will be
cd directory\path; pressENTERto execute.
- The
cdcommand stands for change directory, and it will navigate you from a default directory to one you specify. - The
directory\pathwill be the same as what you entered in Task Scheduler for the Start in (optional) argument. - Continuing our frustration with Microsoft, from the Command Prompt YOU WILL NEED TO ENCLOSE THE PATH WITH DOUBLE QUOTES IF SPACES ARE PRESENT.
- The second line of code will start with the program we are going to run – in this case, our
Rscript.exeprogram. - The second argument of this will be what tells
Rscript.exewhich script to run – this will be ourschedule_script.Rfile. As with the first line, execute the command by hittingENTER.
You can write out the file paths, or you can go back into Task Manager and copy what you already entered there by double clicking on our task, clicking on the Actions tab, and double clicking on the single action we defined.
You will put the full Rscript.exe path first, followed by a space, and then the full path to your schedule_script.R file (and don’t forget to enclose in double quotes if there are spaces in your path).
This may not tell you anything helpful, or you may see error messages that lead you straight to the source of your bug. For our example code, I doubt this will be useful since it’s so simple. With more complex scripts, though, I have found this technique to be greatly advantageous.
So there you have it! We’ve scheduled an R script to run automatically based on a given schedule, and we’ve gone through some simple trouble-shooting tasks by running the script from Commmand Prompt.
Spencer Schien
Senior Manager of Data & Analytics
This is my bio. There are many like it, but this one is mine.